8tree‘s portable 3D scanner enables easy, fast surface inspection in the automotive and aerospace industries. A Manta digital camera from Allied Vision contributes to rapid and accurate measurement.
Contributed by | Allied Vision
3D scanning is being implemented more and more in industrial settings for quality inspection. Using this technology, components can be measured precisely and errors in their geometry can be uncovered automatically. Three-dimensional scanning is most commonly completed with one or more cameras in combination with a laser or light projection. Most systems, however, are in cabinets or permanently installed on robots and/or machines. Additionally, most must be laboriously programmed and calibrated, or they deliver data that only generate useful information for the user after extensive post-processing.
8tree is a new company, specializing in the development of compact, portable scanning systems for surface inspection since 2012. These systems are specified for particular inspection tasks and they stand out with their easy and intuitive operation.
Currently, the product palette consists of three models: dentCHECK, fastCHECK and gapCHECK.

- With dentCHECK, bulges or dents on any product surface are captured – i.e., on an auto body. The system recognizes and measures uneven areas with a precision and speed that would be impossible for human beings.
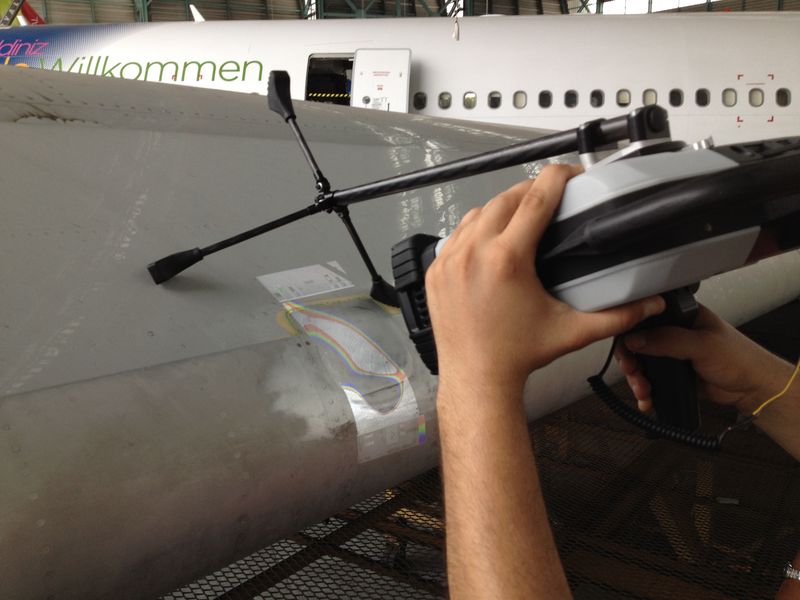
- fastCHECK was specially developed for testing so-called “fasteners” in the aerospace industry, where for example every single rivet on the fuselage must be individually tested. fastCHECK tests all fastenings in the captured area in one operation to verify that they are flush. The system not only recognizes faulty rivets, but also the fault type: too deep, too high, inserted diagonally, etc.
- gapCHECK, in turn, measures the clearances between two components – such as those in vehicle assembly. The scanner tests not only the uniformity of the gap, but also whether both surfaces are flush, as up to 30 checkpoints per operation are measured.

Simply brilliant: Projection for Measurement Grid and User Interface
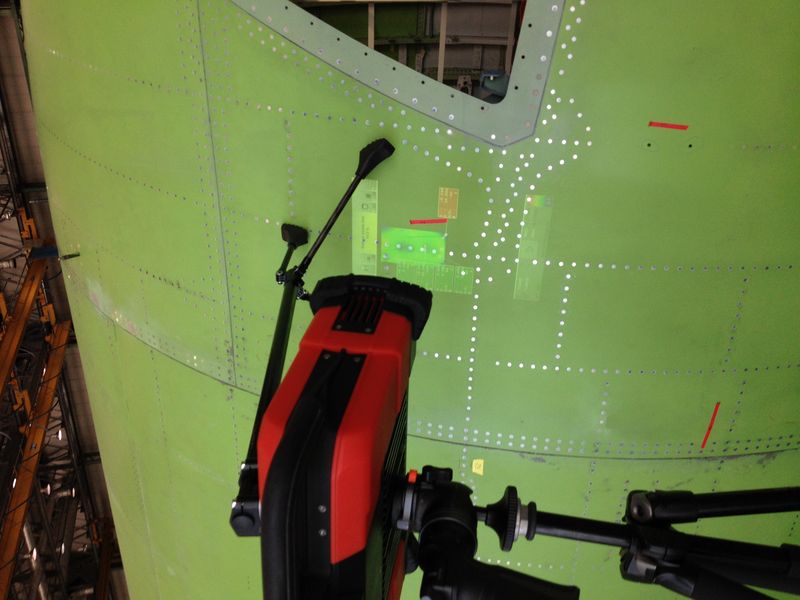
The scanner looks like a small, compact suitcase the size of a projector that can be mounted on a tripod. Thanks to its compact dimensions and minimal weight (less than 3.5 kg or 7.7 lb), the device is easy to transport and manipulate.
All the components are integrated inside this housing: projector, camera, computer, etc. The system is fully autonomous, requiring no connections to computers or displays, for example. Thanks to built-in batteries, it can even be used without an electrical power supply.
The secret behind this flexibility is a simple and yet brilliant idea: the built-in projector is used to project not only the structured light pattern onto the tested surface, but the presentation of the measurement results as well.
The measurement procedure mirrors that of a conventional 3D scanner with structured light: a series of strip rasters is projected within 0.1 seconds onto the test object. The projection is captured by a digital camera whose images are then analyzed using image processing software. The raster’s deformations on the surface deliver precise information about the surface’s condition: irregularities, dents and bulges can be recognized and measured with an accuracy of 50µm.
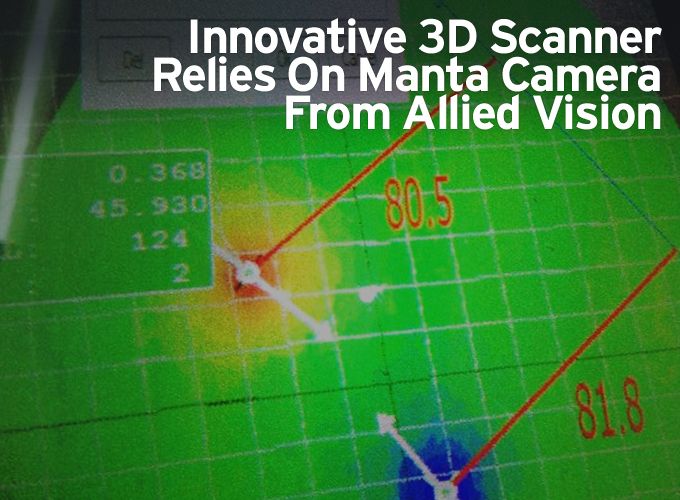
The measurement results are then available within seconds. They are projected directly onto the object: If an irregularity – such as a bulge – is located on the surface, it is marked with a color. Thus, the user can tell immediately whether a fault exists, where it is located, and what type of fault it is. Using a color code, the system indicates, for example, whether a dent in a sheet metal part is pressed inward or outward. Finally, exact values such as the diameter and depth of a bulge are provided as text information.
Thus, using the 8tree Scanner is extremely easy and intuitive. For further editing, detailed measurement results can be exported to different data formats.
The system’s operation is user friendly as well. The scanner is controlled with a few buttons and projected menus, much like a television or projector.
The imaging software is different for each product (dentCHECK, fastCHECK and gapCHECK) and is adjusted for each respective task. These are 8tree’s own developments, built on the OpenCV library. As with the hardware, all software for measurement and operation is preinstalled in the device so that it is absolutely “plug and play”.
Innovation using technology from Allied Vision
In developing their 3D scanner, 8tree turned to Allied Vision to find the optimal camera solution. One of the system’s particular strengths is the measurement practically in real time: within 2 seconds, the object is scanned, the images are analyzed, and the results are displayed. “For that we needed a high-performance digital camera that not only delivered high image quality but that also could capture at least 100 images per second,” remembered Erik Klaas, co-founder and Development Director of 8tree.
Working with Allied Vision, Klaas selected the Manta G-031B, a monochrome camera with VGA resolution and a 125 fps image rate. This camera is equipped with a highly sensitive CCD sensor from Sony and a Gigabit Ethernet interface. With its high image rate, it effortlessly captures the sequence of measurement rasters that the system projects onto the test object at a rate barely perceptible to the human eye.
“We collaborate very closely with Allied Vision. This didn’t end with the completion and market launch of the first three scanner models: we continually develop our system further, and we’re testing new sensors and camera models from Allied Vision. So in the future, for example, we want to elevate the precision with higher resolution, capture larger surfaces per process, and we want to reduce the measurement time with higher image rates,” Klaas said.
Moreover, 8tree is analyzing further potential application areas for its scanner technology. In future, alongside dentCHECK, gapCHECK and fastCHECK, new models for other tasks and other industries could arise.
The novel scanner’s market launch was very successful. 8tree has already been able to sell several systems to Airbus in Germany and Great Britain to check the correct position of fastenings on aircraft wings, for example. In doing so, this innovative measurement technology is contributing to guaranteeing the safety of aircraft.

About Allied Vision
Allied Vision is one of the world leading manufacturers of high-performance digital cameras for industrial image processing. Allied Vision offers a wide range of machine vision cameras with digital interfaces for industrial inspection, automation, medical imaging, scientific research, traffic monitoring, security, and many other demanding applications. Our high-quality FireWire cameras, Gigabit Ethernet cameras, and Camera Link cameras offer high image quality, outstanding reliability and a very high value for money both in the visible and non-visible spectrum (infrared).
The content & opinions in this article are the author’s and do not necessarily represent the views of ManufacturingTomorrow
Comments (0)
This post does not have any comments. Be the first to leave a comment below.
Featured Product


