his case study from the electronics manufacturing industry could be applied to other sectors, and as vision technology advances and experience from its practical application is accumulated, there are sure to be even more challenges addressed using precision machine vision solutions.
Microscan Visionscape® GigE Camera Performs Precision Measurement of Apertures in Digital Camera Housing at Foxconn
Contributed by | Microscan
Overview
- Customer: Foxconn Technology Group
- Industry: Electronics Manufacturing
- Application: Inspecting apertures on external housing of digital cameras
- Product: Microscan Visionscape® GigE Camera
- Reseller/Integrator: Beijing Nodes Network Co., Ltd
Customer Profile
Established in Taiwan in 1974, Foxconn Technology Group is a multi-national technology company specializing in the development and manufacture of computers, communications, and consumer electronics (3C) products. The company is broadly involved in digital content, wireless connectivity, and cloud computing services, as well as the development and application of new energy and new materials. Since transitioning the majority of its operations to mainland China in 1988, the company has rapidly developed and expanded. Today, Foxconn has more than one million employees and the world’s largest customer base, making it the number-one contract electronics manufacturer and the third-largest information technology company by revenue.
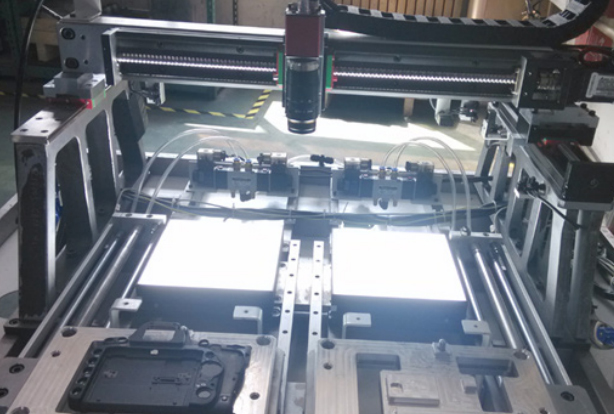
A Microscan machine vision system is integrated on the line to inspect camera housings as they pass in front of backlights, illuminating apertures for precision inspection.
The Challenge
Foxconn performs contract manufacturing of components for many renowned electronics companies, such as Chinese electronics company Xiaomi, a manufacturer of smart phones and digital cameras. During the production of external housing for a line of Xiaomi cameras, Foxconn needed to measure the diameter of the apertures in the camera casing, intended for windows and buttons. The inspection ensured that the holes weren’t too big or too small to fit the camera subassemblies. Producing cameras with inaccurate apertures would not only impede camera functionality, but would lead to customer complaints that would severely affect Xiaomi’s reputation and competitive advantage.
Manual product quality inspection in high-volume production operations requires a significant amount of human resources. The process also requires about three months of training for each employee, who must first become a certified quality inspector before joining the Foxconn inspection line. For Foxconn, implementing this type of workforce demands a huge investment. Additionally, while workers are inspecting products, they can easily become tired, leading to substandard products making their way through to the next stage of production.
Taking into account the dual pressures of quality and cost, Foxconn sought an automated solution that could replace human workers for inspecting the size of the apertures in the cameras housing, with a much higher degree of precision. This solution would need to deliver a level of precision to measure aperture Microscan Visionscape® GigE Camera Performs Precision Measurement of Apertures in Digital Camera Housing at Foxconn size within a width variance of no more than 0.01 mm, and it would need to be able to perform inspection on products of many different shapes over various line changes. Foxconn’s engineers sought the expertise of Microscan Partner Beijing Nodes Network Co., Ltd., who recommended the Microscan Visionscape® GigE Camera for the operation – a PC-based machine vision system capable of conducting precision automated inspection with a high degree of configurability.
The Solution
Foxconn implemented an inspection station into their line using the Visionscape GigE Camera to inspect the camera housing apertures as each piece passed in front of an LED backlight. Lights revealed the apertures in high contrast, enabling the GigE cameras to obtain accurate measurements within 0.01 mm. The solution was able to detect and reject defects so reliably that Foxconn purchased another GigE camera system to serve as its core machine vision equipment. Compared to how the first GigE cameras were used to inspect a localized area on one type of product, this second GigE camera solution was used to inspect numerous varieties of Foxconn cameras, each model bearing 8 to 12 different sizes of either round or rectangular apertures. This application required the vision system to determine both the diameter and roundness of every aperture (the ratio of the smallest diameter to the largest), with precision still within 0.01 mm. After each inspection was completed, the measurement data was saved in a text-based document and supplied to Foxconn’s software developers for processing.
Foxconn’s inspection station is divided into two sides, left and right. The camera housings are placed in a custom-shaped tray, which is moved back and forth by a pneumatic cylinder. Each GigE camera is fixed to the center of a ball screw support above the line, while a white backlight is placed directly below the camera on the line. The support moves the GigE camera back and forth, left and right. In accordance with the programmed sequence of movement and pre-set coordinates, several apertures on a single product can be inspected in one pass. The movement of the ball screw support is controlled by a servomotor connected to a PLC. Underneath the testing platform is the inter-process communication mechanism for the visual digital I/O board, with six input and one output signals connected to the PLC for sending the “trigger” and “ready” signals to tell the camera when to take a picture. After the camera has completed its inspection it sends a “done” signal to the PLC, which will instruct the servomotor to move the camera to the coordinates where the next camera housing will be inspected.
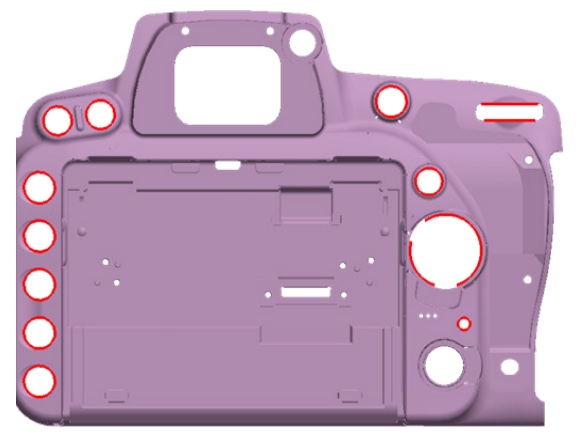
An image captured by a Visionscape GigE Camera, inspecting the apertures on the housing of digital cameras.
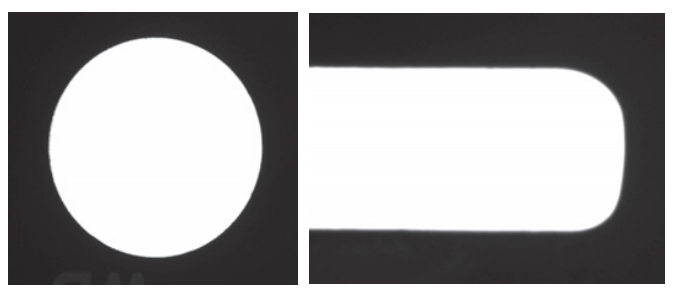
Images captured by the Visionscape GigE Camera of round and rectangular apertures in the camera housing.
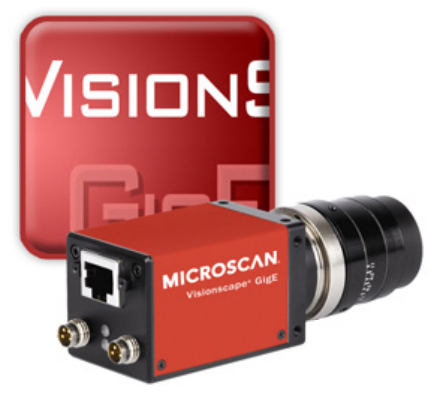
Microscan Visionscape GigE Camera, powered by Visionscape Machine Vision Software.
Because the measurement requirements in this application were especially precise, the solution called for the 5 megapixel GigE camera model with a fixed-focus 50 mm lens. A white LED light source was used for the backlight to enable the camera to clearly capture the characteristics of the shape of each aperture when taking an image. The entire vision system was integrated within Foxconn’s existing inspection platform, achieved through inter-process communication using I/O boards and a programmable logic controller (PLC). After capturing an image of the camera housing for inspection, Visionscape Machine Vision Software processed the image and provided measurement data on the apertures, communicating this data to Foxconn’s existing software to make inspection data available for other purposes. Visionscape could also be adapted for real-time monitoring of the inspection process on other devices and systems.
Microscan’s Visionscape GigE Camera was chosen as Foxconn’s vision solution because it offered the following advantages:
• High-speed, high-resolution image processing
• Full functionality through advanced Visionscape software
• Integration using standard networking protocols and components
• Ability to inspect in tandem with up to eight other cameras
• Multiple camera configurations
• Gigabit Ethernet (GigE) high-speed data transmission
• Compact and lightweight for easy installation in small spaces
• Intuitive user interface with easy access to system statuses, application monitoring, and inspection results
Conclusion and Outlook
Using automated machine vision solutions to replace humans in precision inspection processes offers a low investment with significant results. Not only does automation save on labor costs and economize on human resources, it can significantly increase the reliability and accuracy of product inspection, guaranteeing the quality of products. This case study from the electronics manufacturing industry could be applied to other sectors, and as vision technology advances and experience from its practical application is accumulated, there are sure to be even more challenges addressed using precision machine vision solutions.
The content & opinions in this article are the author’s and do not necessarily represent the views of ManufacturingTomorrow
Comments (0)
This post does not have any comments. Be the first to leave a comment below.
Featured Product
