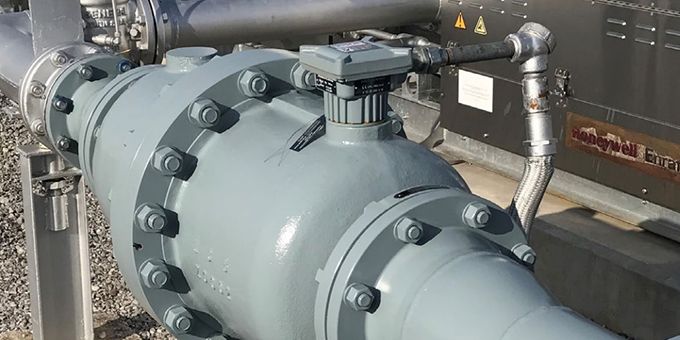
Brodie International, a global manufacturer of high-precision liquid flow meters and valves for the petroleum and industrial markets, realized they needed a better, faster and more accurate way to perform quality inspections.
 Industrial Producer Saves Time, Reduces Scrap & Satisfies Customers

Case Study from | FARO
The Challenge
Brodie products involve components with complex shapes and assembly, that make inspection measurements a serious challenge with the traditional tools of their industry, including height gages, calipers, dial indicators, and a fixed coordinate measuring machine (CMM).
“We were using a fixed CMM,” says Tommy Rogers, Quality Manager at Brodie International. “Our older model CMM is good for measuring things like linear dimensions, hole patterns, tapers, circles, and geometry. But when it comes to measuring a compound-curve like a helical shape, we were very limited.”
Much of the QC oversight depended on proofing a product after final assembly.
“Previously, verification that the helical-shaped rotors were machined correctly was unknown until we actually did the proving of the meter,” explains Rogers. “We measure performance of our meters based on what’s indicated going through the meter, versus the volume measured by the prover. The volume measured by the prover verifies that the meter is measuring correctly.”
As Brodie introduced new offerings, the increase in size also increased the inspection challenges.
The Solution
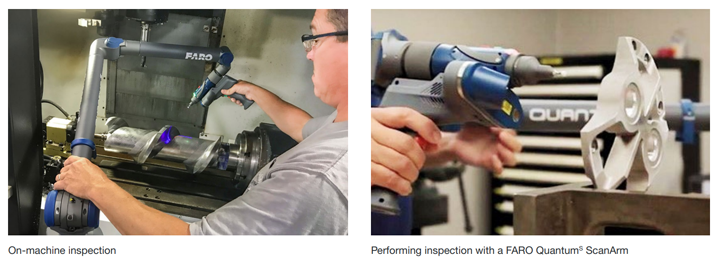
The Brodie team knew it was time to upgrade their inspection systems. Although they had previously dismissed 3D laser scanning technology as not accurate enough, they took a second look at FARO’s line of 3D measurement solutions. What they saw convinced them to invest in FARO QuantumS ScanArm due to its speed, accuracy, and flexibility.
“For components that we machine, most all dimensional tolerances are held within plus or minus 5 thousandths of an inch,” says Rogers. “For use in our shop, we were skeptical that laser scanners were going to give us the accuracy we needed, but after we had a FARO rep demonstrate the QuantumS Arm, and once we saw the upgraded arm perform, we decided that, yes it most definitely was something that we would be interested in.”
With excellent ergonomics and dual hot-swappable batteries, the QuantumS became the first arm to meet the most rigorous specifications of the international standard, ISO 10360-12, regarding acceptance and reverification tests for coordinate measuring systems. With the built-in hard probe and the FAROBlu® Laser Line Probe, the system can digitize interchangeably without having to remove either component. Users can digitize simple features with the arm’s hard probe and seamlessly scan across diverse surface materials regardless of contrast, reflectivity, or part complexity, without any special coatings or target placement.
The company’s decision was immediately rewarded.
“Using the FAROBlu scanner, I can develop a point cloud and merge that with the CAD model,” explains Corey Phillips, Brodie Metrology Technician. “With that I can create a sectional view which gives us an indication where part material might be under- or over-sized. We’re now able to give feedback to the operator and use the FaroArm to do confirmation of the parts while they are still on the machine.” In the past, parts had to be removed from the machine for inspection elsewhere in the factory. This consumed transit time, but even more so, it often took more time to re-mount the part in the machine than to re-machine the part.
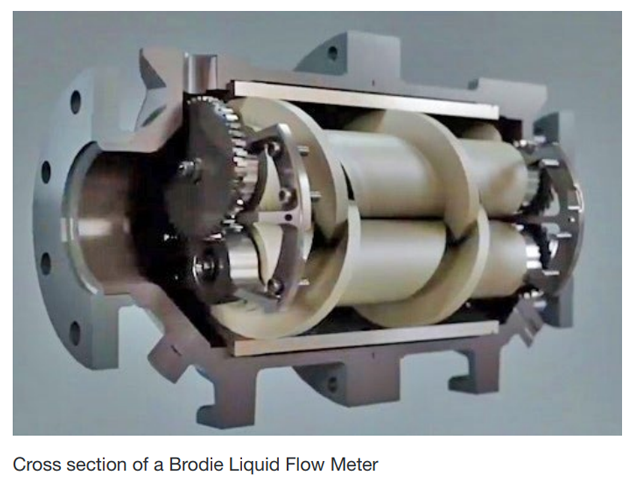
Material for meter and valve assemblies includes stainlesssteel and cast-aluminum components. Being able to accurately measure final machining of these parts has a great impact on the company’s profitability. Scrap due to out-of-tolerance machining is not acceptable.
“When we’re talking about a rotor that is 42 inches long and 10 inches in diameter, the cost of that piece of metal as scrap is phenomenal,” says Phillips. “Being able to machine it right the first time is critical, and the ScanArm helps us do that.”
The Brodie team has also realized significant time savings with the ScanArm.
“Before we had the FARO, we needed to inspect prototype castings that were machined outside of our facility,” says Rogers “We received these 10 castings and it took about ten days to inspect using our existing CMM machine because there were some very difficult areas to get to inside of the body. It was a very time-consuming effort. Now, we can do the same task in about 30 minutes just as accurately and gather infinitely more data at the same time.”
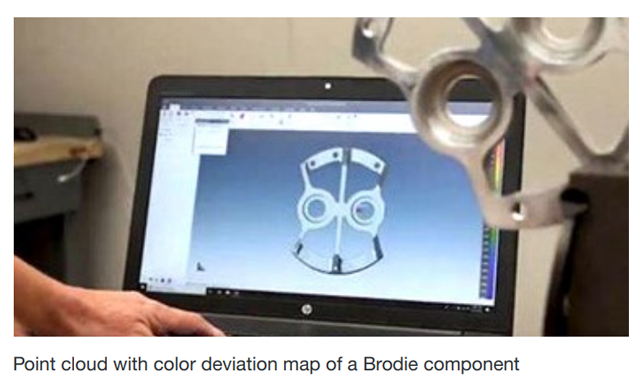
CAM2® Software Brings the Data Alive
Measurement data, in and of itself, is only half of the inspection story. In fact, operation and analysis typically involve a greater portion of time spent interfacing with software rather than gathering data with the hardware. Measurement hardware must be paired with the right software to reap the maximum benefits from one’s investment.
Four Good Reasons Why Brodie International Chose the QuantumS ScanArm
- For inspecting complicated parts with compound curves, the QuantumS ScanArm offered better speed, detail, and repeatability than conventional measurement tools such as height gages, calipers and fixed CMMs. Moreover, the QuantumS ScanArm was the first portable measurement arm to meet Brodie’s accuracy requirements.
- Portability enabled parts to be measured onmachine, saving a huge amount of time, not only in transit, but in eliminating the time lost when remounting the part on the machine after measurement.
- In one application, using the QuantumS reduced inspection time from 10 hours to just 30 minutes, while gathering infinitely more data versus the fixed CMM.
- Customer satisfaction was improved as a result of higher quality and more efficient production, leading to faster delivery.
“The more I use the CAM2 software, the more I realize how much it can do,” explains Phillips. “Our operators are anxious to dig into its GD&T capabilities.”
Without the need for extensive training or expertise, CAM2 provides a seamless and manageable measurement experience for all users, along with accurate and comprehensive insight into measurement results.
With CAM2, any user can quickly and easily accomplish their measurement tasks and capture actionable business data through the intuitive user interface and image-guided, automated measurement workflows.
“The reports that CAM2 generates are really nice documents,” says Rogers. “The information and images provide great feedback. CAM2’s report format makes the other stuff look like it’s written in DOS language!”
Return on Investment
“We are frequently involved in multimillion-dollar projects where our meters play just a small part, but if our customers don’t have that meter on time, delays will occur at the jobsite which may include delivery penalties,” says Rogers. “So, on-time delivery is crucial to our customer satisfaction, which we constantly measure. On-time delivery and customer satisfaction are cornerstones in our ISO certification.”
The benefits of the ScanArm are not lost on Brodie’s management team either.
“We feel very good about the investment,” says Rogers. “Ruppi von Gwinner, President of Brodie, is very proactive, and he took our recommendation to make the investment. When he saw what we’ve able to do with the arm and the feedback we’re able to supply to the production group, he’s been nothing but supportive. David Molloy, Brodie Engineering Manager, is very much in favor the arm and actually helped in the justification of the purchase to our management team. He understands the challenges we have developing new product lines and helped in getting this acquisition made.”
The content & opinions in this article are the author’s and do not necessarily represent the views of ManufacturingTomorrow
Comments (0)
This post does not have any comments. Be the first to leave a comment below.
Featured Product

